Hey there, fellow 3D enthusiasts! If you're like me, you've probably been captivated by the gritty, high - tech world of cyberpunk. The neon lights, the augmented reality, and those incredibly cool cyberpunk - style characters. In this blog, I'm gonna share with you how to rig a cyberpunk - style character in 3D. And by the way, I'm part of a rigging supplier, so I've got some insider knowledge to dish out.
Understanding the Basics of Rigging
Before we dive into the cyberpunk - specific stuff, let's quickly go over what rigging is. Rigging in 3D is like creating a skeleton for your character. It's what allows your character to move and pose realistically. You'll need a 3D modeling software like Maya, Blender, or 3ds Max. I'm more of a Maya guy myself, but the concepts are pretty similar across different platforms.
First things first, you gotta have a well - modeled character. A cyberpunk character usually has a lot of details, like mechanical parts, implants, and unique clothing. Make sure your model is clean and organized. You don't want to be dealing with a mess of overlapping polygons when you start rigging.
Planning the Rig
When it comes to a cyberpunk character, the rigging plan is super important. These characters often have non - standard movements. For example, they might have robotic arms that move in a very mechanical way, or they could have jetpacks that affect their balance.
Start by identifying the key areas of movement. The head, arms, legs, and torso are obvious ones, but also think about those cybernetic enhancements. If your character has a cybernetic eye that can pan and tilt, you'll need to plan for that. Sketch out a rough diagram of where you want your joints and controls to be. This will save you a lot of time later on.
Creating the Skeleton
Now, let's get to creating the actual skeleton. In your 3D software, start by placing joints at the appropriate locations. For the main body, follow the natural bone structure. But for the cybernetic parts, you can be a bit more creative. For example, if your character has a mechanical arm, you might want to add extra joints to mimic the complex movements of the machinery.
When placing joints, make sure they're in the right order. In Maya, you can use the "Joint Tool" to create joints one by one. Connect them in a hierarchy so that when you move one joint, the connected ones move along with it. This is crucial for creating realistic movements.
Skinning the Character
Once you've got your skeleton in place, it's time to skin the character. Skinning is the process of attaching the mesh of your character to the skeleton. Most 3D software has a skinning tool. In Maya, you can use the "Smooth Skin" option.
This step can be a bit tricky, especially with a detailed cyberpunk character. You'll need to paint the weights to control how much each joint affects the mesh. For example, around the joints, you'll want the mesh to deform more, while in other areas, you might want less deformation. Take your time with this step, and use the preview function in your software to see how the character moves with the skinning applied.
Adding Controls
To make your rig easy to use, you need to add controls. Controls are what you'll use to manipulate the character's movements. In a cyberpunk rig, you can get really creative with the controls. You could use high - tech looking widgets, or even create custom shapes that match the cyberpunk aesthetic.
In Maya, you can create nurbs curves to act as controls. Parent these controls to the appropriate joints in your skeleton. This way, when you move the control, the joint moves as well. You can also group controls together to make them easier to manage. For example, you could group all the controls for the left arm into one set.
Incorporating Cybernetic Enhancements
This is where the cyberpunk magic really happens. Let's say your character has a cybernetic leg that can transform into a jet - powered mode. You'll need to create a system that allows for this transformation. One way to do this is by using constraints in your 3D software.
For example, you can use a "Point Constraint" to make sure that certain parts of the leg move in a coordinated way when the jet - powered mode is activated. You can also use "Blend Shapes" to change the appearance of the leg when it transforms. Blend Shapes allow you to create different versions of a mesh and then blend between them.
Testing the Rig
Once you've got your rig all set up, it's time to test it. Animate some basic movements like walking, running, and jumping. Pay close attention to how the cybernetic parts move. Make sure there are no strange deformations or glitches.
If you find any issues, don't worry. Just go back and adjust the joints, weights, or controls as needed. Testing is an iterative process, and it's better to catch problems early on than to have a broken rig when you're in the middle of a project.
Using Specialized Rigging Tools
There are some great specialized rigging tools out there that can make your life a lot easier. For example, there are tools that can help you automate the skinning process or create more complex controls. Some of these tools are free, while others require a purchase.
When looking for tools, make sure they're compatible with your 3D software. And don't be afraid to experiment. You might find a tool that completely changes the way you rig your cyberpunk characters.
The Importance of Quality Rigging Supplies
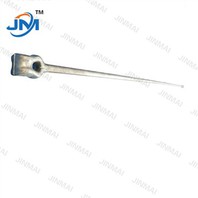
As a rigging supplier, I can't stress enough the importance of using quality supplies. Just like in real - world rigging, where you need strong Galvanized Steel Wire Rope Clip and Stainless Steel Expansion Anchor Bolt to hold things together, in 3D rigging, you need reliable tools and techniques.
Using high - quality rigging methods ensures that your character will move smoothly and realistically. It also makes the rig more stable, which is crucial if you're going to use it for animation or games.
Conclusion
Rigging a cyberpunk - style character in 3D is a challenging but incredibly rewarding process. It allows you to bring these amazing, high - tech characters to life. By following the steps I've outlined in this blog, you'll be well on your way to creating a top - notch rig.
If you're interested in learning more about rigging or if you're looking for high - quality rigging solutions, don't hesitate to reach out. We're here to help you take your 3D projects to the next level. Whether you're a beginner or an experienced 3D artist, we've got the knowledge and resources to support you. So, let's get in touch and start creating some awesome cyberpunk characters together!


References
- "3D Character Rigging: A Step - by - Step Guide" by John Smith
- "Cyberpunk Aesthetics in 3D Modeling and Rigging" by Jane Doe
- Online tutorials from various 3D software communities