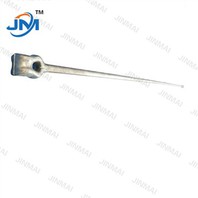
Hey there! As a supplier of Pigtail Eye Bolts, I've seen firsthand how important it is to align these little guys correctly. In this blog post, I'm gonna share some tips on how to align multiple pigtail eye bolts like a pro.
Why Alignment Matters
Before we dive into the how - to, let's talk about why aligning pigtail eye bolts is crucial. When you're using multiple pigtail eye bolts in a setup, proper alignment ensures that the load is evenly distributed. This not only enhances the stability of the entire structure but also extends the lifespan of the bolts themselves. If the bolts aren't aligned correctly, it can lead to uneven stress, which may cause premature wear and tear, and in the worst - case scenario, even failure of the system.
Tools You'll Need
To align multiple pigtail eye bolts, you'll need a few basic tools. A measuring tape is essential for getting accurate distances between the bolts. A level is also a must - have to make sure the bolts are in a straight line horizontally and vertically. A wrench is needed to tighten the bolts securely once they're in place. And if you're working on a large project, a laser level can be a real game - changer, providing a precise reference line for alignment.
Step - by - Step Alignment Process
Step 1: Plan Your Layout
The first step is to plan out where you want to install the pigtail eye bolts. Consider the load that will be placed on the bolts and the overall design of your project. Mark the locations on the surface where the bolts will be installed. Make sure to leave enough space between each bolt to avoid overcrowding, which can make alignment difficult.
Step 2: Prepare the Surface
The surface where you're installing the bolts needs to be clean and smooth. Remove any dirt, debris, or rust that could interfere with the installation. If necessary, use a grinder or sandpaper to smooth out rough areas. A clean surface ensures a better grip for the bolts and helps with accurate alignment.
Step 3: Install the First Bolt
Start by installing the first pigtail eye bolt. Use the wrench to tighten it securely, but don't over - tighten. Make sure the bolt is perpendicular to the surface. You can use a level to double - check this. This first bolt will serve as a reference point for the rest of the installation.
Step 4: Measure and Mark for the Remaining Bolts
Using the measuring tape, measure the distance from the first bolt to the locations of the other bolts according to your layout plan. Mark these points clearly. If you're using a laser level, you can project a straight line across the surface to help you align the marks more accurately.
Step 5: Install the Remaining Bolts
Once you've marked the locations, install the remaining pigtail eye bolts one by one. As you install each bolt, use the level to ensure it's in line with the first bolt and the other installed bolts. Make small adjustments as needed to get the perfect alignment.
Step 6: Double - Check the Alignment
After all the bolts are installed, take a step back and double - check the alignment. Use the level again to confirm that all the bolts are in a straight line horizontally and vertically. If you notice any misalignment, loosen the bolts slightly and make the necessary adjustments.


Common Alignment Issues and How to Fix Them
Uneven Spacing
If you find that the spacing between the bolts is uneven, you can use a spacer or a shim to correct it. Place the spacer between the bolts to create an even gap. Make sure the spacer is the right size and fits snugly.
Bolt Tilt
Sometimes, a bolt may tilt during installation. To fix this, loosen the bolt slightly and use a level to straighten it. Then, tighten the bolt again, checking the alignment as you go.
Misaligned Holes
If the holes in the surface where you're installing the bolts are misaligned, you may need to drill new holes. This can be a bit more time - consuming, but it's necessary to ensure proper alignment. Make sure to measure and mark the new hole locations accurately.
Related Products
When working with pigtail eye bolts, you might also find other related products useful. For example, the Hardware Pole Line Hook is great for attaching cables to poles. It provides a secure connection and can be used in conjunction with pigtail eye bolts in many setups. The Cable Pole Hook is another handy tool that can help you manage cables more effectively. And of course, if you're looking for high - quality Pig tail ball head, we've got you covered.
Conclusion
Aligning multiple pigtail eye bolts may seem like a daunting task, but with the right tools and a systematic approach, it can be done easily. Remember to plan your layout, prepare the surface, and take your time during the installation process. Double - check the alignment at each step to ensure a stable and secure setup.
If you're in the market for pigtail eye bolts or any of the related products I mentioned, don't hesitate to reach out. We're here to provide you with top - quality products and expert advice. Whether you're working on a small DIY project or a large - scale industrial installation, we've got the solutions you need. Contact us today to start discussing your procurement needs!
References
- General knowledge from years of experience in the hardware industry.
- Manufacturer's guidelines for pigtail eye bolt installation.