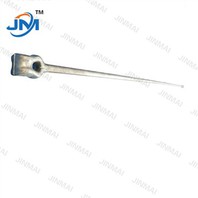
As a seasoned supplier of ADSS cable hardware, I've witnessed firsthand the significance of correctly connecting ADSS cable hardware to the cable. This process isn't just about attaching components; it's about ensuring the long - term performance, safety, and reliability of the entire ADSS cable system. In this blog, I'll share a comprehensive guide on how to achieve this crucial connection.
Understanding ADSS Cable and Its Hardware
Before delving into the connection process, it's essential to understand what ADSS cable and its hardware are. ADSS (All - Dielectric Self - Supporting) cable is a type of optical fiber cable that is self - supporting and does not contain any metallic components. This makes it ideal for use in high - voltage environments as it is immune to electromagnetic interference.
ADSS cable hardware, on the other hand, includes a variety of components such as clamps, insulators, and thimbles. These components are designed to support, protect, and connect the ADSS cable to the supporting structures. For example, Insulated Wedge Clamp is used to secure the cable at suspension points, while High Voltage Line Insulator provides electrical insulation and mechanical support. The Pole Line Hardware Forged Thimble Eye is useful for providing a smooth path for the cable and preventing it from chafing.
Pre - installation Preparation
Site Inspection
The first step in connecting ADSS cable hardware to the cable is to conduct a thorough site inspection. This involves assessing the terrain, the existing infrastructure, and the environmental conditions. Check for any potential obstacles such as trees, buildings, or other utilities that may interfere with the cable installation. Also, evaluate the wind and ice loading conditions at the site, as these factors will determine the appropriate hardware selection and installation method.
Cable and Hardware Inspection
Before installation, carefully inspect the ADSS cable and the hardware. Look for any signs of damage, such as cuts, abrasions, or cracks on the cable. Check the hardware for proper dimensions, smooth surfaces, and correct material specifications. Ensure that all the required hardware components are present and in good condition.
Tools and Equipment Preparation
Gather all the necessary tools and equipment for the installation. This may include cable cutters, torque wrenches, crimping tools, and safety equipment such as gloves and safety glasses. Make sure that the tools are in good working condition and calibrated correctly.
Connecting the Hardware to the Cable
Suspension Clamps Installation
Suspension clamps are one of the most critical hardware components for ADSS cable installation. They are used to support the cable at regular intervals along the span.


- Measure and Mark: First, measure the cable at the suspension points according to the design requirements. Mark the positions clearly on the cable.
- Prepare the Clamp: Open the suspension clamp and clean the contact surfaces. Apply a thin layer of anti - corrosion grease to the clamp jaws if required.
- Install the Clamp: Place the cable into the clamp jaws at the marked position. Make sure the cable is centered and aligned properly. Tighten the clamp bolts gradually using a torque wrench to the specified torque value. Over - tightening or under - tightening can lead to premature cable failure or improper support.
Dead - end Clamps Installation
Dead - end clamps are used to terminate the ADSS cable at the end of the span or at intermediate anchor points.
- Cable Preparation: Cut the cable to the appropriate length at the dead - end point. Strip the outer jacket of the cable to expose the strength members.
- Prepare the Dead - end Clamp: Assemble the dead - end clamp components according to the manufacturer's instructions. Insert the exposed strength members into the clamp and secure them using crimping tools or other specified methods.
- Attach the Clamp to the Structure: Connect the dead - end clamp to the supporting structure using the appropriate hardware, such as bolts or shackles. Ensure that the connection is secure and can withstand the expected tension forces.
Insulator Installation
Insulators play a vital role in providing electrical insulation and mechanical support for the ADSS cable.
- Mounting the Insulator: Install the insulator on the supporting structure, such as a pole or a tower. Use the appropriate mounting hardware and ensure that the insulator is firmly attached.
- Connecting the Cable to the Insulator: Use a suitable connector or clamp to attach the ADSS cable to the insulator. Make sure that the connection is flexible enough to allow for cable movement due to temperature changes and wind loads, while still maintaining a secure hold.
Testing and Quality Assurance
Visual Inspection
After the hardware installation is complete, conduct a visual inspection of the entire installation. Check for any loose connections, misaligned hardware, or signs of cable damage. Make sure that all the hardware components are installed correctly and that there are no visible defects.
Tension Testing
Perform tension testing on the ADSS cable to ensure that it is properly tensioned. Use a tension meter to measure the cable tension at different points along the span. Compare the measured values with the design specifications. Adjust the tension if necessary by loosening or tightening the dead - end clamps.
Electrical Testing
If the ADSS cable is installed in a high - voltage environment, conduct electrical testing to verify the insulation performance of the hardware and the cable. This may include tests such as insulation resistance testing and dielectric strength testing.
Maintenance and Long - term Considerations
Regular Inspections
Establish a regular inspection schedule for the ADSS cable and its hardware. Inspect the cable and hardware at least once a year, or more frequently in harsh environmental conditions. Look for signs of wear, corrosion, or damage. Replace any damaged or worn - out components promptly.
Environmental Protection
Protect the ADSS cable and its hardware from environmental factors such as UV radiation, moisture, and chemical exposure. Apply protective coatings or covers if necessary. Ensure that the cable is installed in a way that minimizes its exposure to extreme weather conditions.
Conclusion
Connecting ADSS cable hardware to the cable is a complex but crucial process that requires careful planning, proper installation techniques, and regular maintenance. By following the steps outlined in this blog, you can ensure a reliable and long - lasting ADSS cable installation.
As a leading supplier of ADSS cable hardware, we offer a wide range of high - quality products and professional technical support. If you are interested in purchasing our ADSS cable hardware or have any questions about the installation process, please feel free to contact us for further discussion and negotiation. We are committed to providing you with the best solutions for your ADSS cable projects.
References
- Telecommunications Industry Association (TIA) standards for ADSS cable installation.
- Manufacturer's installation manuals for ADSS cable hardware.
- IEEE standards for high - voltage cable installation and testing.