Installing ADSS (All-Dielectric Self-Supporting) cable fittings correctly is crucial for the long - term performance and safety of your fiber optic network. As a trusted ADSS Cable Fittings supplier, I have witnessed firsthand the importance of proper installation. In this blog, I will share some key steps and considerations to ensure that you install ADSS cable fittings correctly.


Pre - installation Preparations
Before you start the installation process, it is essential to conduct a thorough site survey. Check the route where the ADSS cable will be installed. Look for any potential obstacles such as trees, buildings, or other utility lines that could interfere with the cable's path. Measure the distance between poles or other support structures accurately. This information will help you determine the appropriate length of the cable and the number of fittings required.
Gather all the necessary tools and equipment. This typically includes cable cutters, wrenches, and safety gear such as gloves and safety glasses. Make sure that all tools are in good working condition to avoid any delays or accidents during the installation.
Inspect all the ADSS cable fittings before installation. Check for any signs of damage, such as cracks, dents, or corrosion. Any defective fittings should be replaced immediately to ensure the integrity of the installation.
Installation of Support Structures
The first step in installing ADSS cable fittings is to set up the support structures. This often involves installing Pole Top Bracket. Pole top brackets provide a stable base for the cable and other fittings. When installing pole top brackets, ensure that they are firmly attached to the poles. Use the appropriate bolts and nuts, and tighten them to the recommended torque. This will prevent the brackets from loosening over time due to wind, vibration, or other environmental factors.
Make sure that the pole top brackets are level and aligned correctly. Misaligned brackets can cause stress on the cable, leading to premature failure. Use a spirit level to check the horizontal and vertical alignment of the brackets during installation.
Cable Suspension
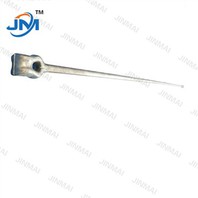
Once the support structures are in place, it's time to suspend the ADSS cable. This is where Hook for Power Fittings come into play. Hooks are used to attach the cable to the support structures.
Before attaching the hooks, mark the cable at regular intervals to ensure even spacing. This will help distribute the weight of the cable evenly and prevent excessive stress on any one point. Carefully place the hooks on the cable and then attach them to the support structures. Make sure that the hooks are securely fastened to avoid the cable from slipping off.
When suspending the cable, pay attention to the sag. The sag of the cable is crucial for its performance. Too much sag can cause the cable to touch the ground or other objects during adverse weather conditions, while too little sag can put excessive tension on the cable, leading to breakage. Refer to the manufacturer's guidelines for the recommended sag based on the cable type, span length, and environmental conditions.
Cable Termination
Cable termination is a critical step in the installation process. It involves connecting the ADSS cable to other components of the network, such as optical distribution frames or other cables. Bolt Wire Clamp can be used to secure the cable during termination.
First, strip the outer jacket of the cable carefully using cable strippers. Make sure not to damage the inner fibers. Then, clean the exposed fibers to remove any dirt or debris. This will ensure a good connection.
Insert the fibers into the appropriate connectors and use bolt wire clamps to secure the cable to the termination equipment. Tighten the bolts of the clamps to the specified torque to prevent the cable from moving or coming loose.
After termination, test the connection using an optical time - domain reflectometer (OTDR). This will help you detect any faults or losses in the connection and ensure that the cable is functioning properly.
Grounding
Grounding is an important safety measure when installing ADSS cable fittings. It helps protect the cable and the network from lightning strikes and other electrical surges. Install grounding wires along the cable route and connect them to the support structures and termination equipment.
Make sure that the grounding wires are properly sized and installed according to local electrical codes. A good grounding system will provide a low - resistance path for electrical current to flow safely into the ground, reducing the risk of damage to the cable and associated equipment.
Post - installation Inspection
Once the installation is complete, conduct a comprehensive post - installation inspection. Check all the fittings for tightness. Make sure that all bolts and nuts are properly tightened and that there are no loose connections.
Inspect the cable for any signs of damage or stress. Look for kinks, cuts, or abrasions on the cable surface. If any damage is found, repair or replace the affected section of the cable immediately.
Verify the performance of the cable using appropriate testing equipment. Check the optical loss, signal strength, and other parameters to ensure that the cable is meeting the required specifications.
Maintenance Considerations
Proper maintenance is essential for the long - term performance of ADSS cable fittings. Regularly inspect the fittings and the cable for any signs of wear and tear. Check for corrosion on metal fittings and replace them if necessary.
Keep the cable and fittings clean. Remove any dirt, debris, or vegetation that may accumulate on the cable or support structures. This will prevent damage and ensure the proper functioning of the network.
Monitor the environmental conditions around the cable installation. Extreme temperatures, high winds, and heavy rainfall can all affect the performance of the cable and fittings. Be prepared to take appropriate measures, such as adjusting the sag of the cable or reinforcing the support structures, in response to changing environmental conditions.
Conclusion
Installing ADSS cable fittings correctly is a multi - step process that requires careful planning, proper tools, and attention to detail. By following the steps outlined in this blog, you can ensure a successful installation that will provide reliable performance for your fiber optic network.
As a leading ADSS Cable Fittings supplier, we are committed to providing high - quality products and expert advice. If you have any questions about ADSS cable fittings installation or need to purchase our products, please feel free to contact us for further discussions. Our team of professionals is ready to assist you in finding the best solutions for your network needs.
References
- "Fiber Optic Cable Installation Handbook" by Industry Experts
- Manufacturer's Guidelines for ADSS Cable Fittings