Installing an insulator spindle on a curved surface can be a challenging yet crucial task, especially in electrical and related industries. As a leading supplier of insulator spindles, I've witnessed firsthand the importance of a proper installation process. In this blog, I'll share some valuable insights on how to install an insulator spindle on a curved surface effectively.
Understanding the Basics of Insulator Spindles
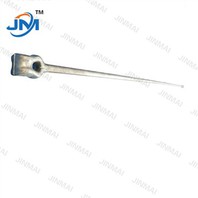
Before delving into the installation process, it's essential to understand what an insulator spindle is and its significance. Insulator spindles are critical components used in electrical systems to support and insulate conductors. They come in various types, such as Pin Insulator Spindle, which is commonly used in overhead power lines, and Voltage Insulator Spindle, designed to handle specific voltage requirements. The Steel Pin of Pin Insulator is another important part that provides structural support.


Pre - installation Preparations
Surface Inspection
The first step in installing an insulator spindle on a curved surface is to thoroughly inspect the surface. Check for any cracks, irregularities, or contaminants that could affect the installation. A smooth and clean surface is essential for a secure and reliable installation. Use a suitable cleaning agent to remove dirt, grease, or other debris. If there are any cracks, they should be repaired before proceeding with the installation.
Selecting the Right Insulator Spindle
Choosing the appropriate insulator spindle for the curved surface is crucial. Consider factors such as the curvature of the surface, the electrical requirements of the system, and the environmental conditions. Our company offers a wide range of insulator spindles that are designed to meet different needs. Make sure to select a spindle that is compatible with the curved surface and can withstand the expected loads and stresses.
Gathering the Necessary Tools
You'll need a set of tools for the installation process. Some of the essential tools include a drill, screws or bolts, a torque wrench, a level, and a measuring tape. Ensure that all the tools are in good working condition and are the correct size and type for the installation.
Installation Process
Marking the Installation Points
Use a measuring tape and a level to mark the exact points where the insulator spindle will be installed on the curved surface. This step is crucial for ensuring proper alignment and spacing. Make sure the marks are clear and accurate.
Drilling Holes
Once the installation points are marked, carefully drill holes into the curved surface. Use a drill bit that is the appropriate size for the screws or bolts that will be used to secure the insulator spindle. Be cautious when drilling on a curved surface to avoid damaging the surface or the spindle. It may be necessary to use a drill guide to ensure straight and accurate holes.
Inserting Fasteners
Insert the screws or bolts into the drilled holes. Use a torque wrench to tighten the fasteners to the specified torque value. Over - tightening or under - tightening the fasteners can lead to a weak installation or damage to the insulator spindle. Follow the manufacturer's instructions for the correct torque values.
Mounting the Insulator Spindle
Carefully place the insulator spindle on the installed fasteners. Make sure it is properly aligned and seated on the curved surface. Double - check the alignment using a level. Once the spindle is in place, tighten the remaining fasteners to secure it firmly.
Post - installation Checks
Checking the Alignment
After the installation is complete, re - check the alignment of the insulator spindle. It should be perfectly aligned with the electrical conductors and other components of the system. Any misalignment can cause electrical problems or reduce the effectiveness of the insulation.
Testing the Installation
Conduct a series of tests to ensure the reliability of the installation. This may include electrical tests to check for proper insulation and mechanical tests to verify the stability of the spindle. If any issues are detected, they should be addressed immediately.
Inspection for Long - term Performance
Regularly inspect the insulator spindle for signs of wear, damage, or deterioration. This will help to identify any potential problems early and take appropriate measures to prevent failures. Our company offers maintenance services and support to ensure the long - term performance of the insulator spindles.
Benefits of Professional Installation
While it may be tempting to attempt a DIY installation, professional installation of an insulator spindle on a curved surface offers several benefits. Professional installers have the experience, skills, and knowledge to ensure a proper and safe installation. They are also familiar with the latest industry standards and regulations, which helps to avoid potential legal issues. Additionally, professional installation can save time and money in the long run by reducing the risk of costly repairs and replacements.
Conclusion
Installing an insulator spindle on a curved surface requires careful planning, the right tools, and proper techniques. By following the steps outlined in this blog, you can ensure a successful installation. Our company is committed to providing high - quality insulator spindles and excellent customer service. If you have any questions or need assistance with the installation process, or if you're interested in purchasing insulator spindles for your project, please feel free to contact us. We're here to help you find the best solutions for your electrical insulation needs.
References
- Electrical Insulation Handbook, Third Edition, McGraw - Hill
- Standards for Insulator Spindles, International Electrotechnical Commission (IEC)