Hey there! As a supplier of ADSS cable fittings, I often get asked about the installation sequence of these crucial components. In this blog, I'll break down the steps for you in a simple and easy - to - understand way.
Step 1: Preparation
Before you start installing ADSS cable fittings, you need to have all the necessary tools and materials ready. This includes the ADSS cable itself, various fittings like clamps, suspension clamps, dead - end clamps, and other accessories. You also need safety equipment such as gloves, helmets, and safety harnesses if you're working at height.
Make sure you've measured the installation site accurately. Check the Electric Pole Cross Arm for any signs of damage or wear. If it's not in good condition, it might affect the stability of the entire ADSS cable system. You can also inspect the poles to ensure they are firmly planted and can support the weight of the cable and fittings.
Step 2: Mounting the Cross Arm
The cross arm is an essential part of the ADSS cable installation. You can use the Cross Arm of Power Fittings for this step. First, position the cross arm on the pole at the appropriate height. This height is usually determined by factors such as the clearance requirements from the ground, other power lines, and any nearby structures.
Use bolts and nuts to secure the cross arm tightly to the pole. Make sure it is level and straight. A misaligned cross arm can cause uneven stress on the cable and fittings, which may lead to premature failure. Double - check the tightness of all the bolts after installation.
Step 3: Installing the Suspension Clamps
Once the cross arm is in place, it's time to install the suspension clamps. These clamps are used to support the ADSS cable along its route. Place the suspension clamps at regular intervals on the cross arm. The spacing between the suspension clamps depends on the span length and the weight of the cable.
Open the suspension clamps carefully and place the ADSS cable inside. Make sure the cable is centered within the clamp. Then, close the clamp and tighten the bolts. The tightness should be just right - not too loose that the cable can slip out, but not so tight that it damages the cable.
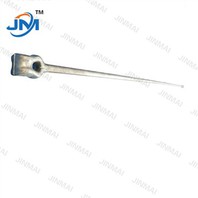
Step 4: Using Parallel Groove Clamps
For connecting different sections of the ADSS cable or for making connections to other components, JBT Parallel Groove Clamp can be very useful. Clean the surfaces of the cable and the parts to be connected before using the parallel groove clamps.
Place the two cables or components to be joined side by side in the groove of the clamp. Make sure they are in good contact. Then, tighten the bolts on the clamp. This will create a secure electrical and mechanical connection between the parts.
Step 5: Installing Dead - End Clamps
At the ends of the ADSS cable run, you need to install dead - end clamps. These clamps are designed to anchor the cable firmly and prevent it from pulling out. First, strip the outer sheath of the cable at the end to expose the inner strength members.
Insert the strength members into the dead - end clamp. There are usually specific channels or slots for this purpose. Then, use the appropriate fasteners to secure the strength members inside the clamp. Make sure the dead - end clamp is attached to a suitable structure, such as the cross arm or a terminal pole.
Step 6: Testing and Inspection
After all the ADSS cable fittings are installed, it's crucial to conduct a thorough test and inspection. Check the tightness of all the bolts and connections again. Look for any signs of damage to the cable or fittings, such as cracks, scratches, or deformation.
Test the electrical performance of the cable if applicable. This may involve checking the insulation resistance, capacitance, and other electrical parameters. Make sure the cable is properly grounded to prevent electrical hazards.


Step 7: Final Adjustments
Based on the test and inspection results, make any necessary final adjustments. If you find that a clamp is too loose or too tight, adjust it accordingly. You may also need to re - position some of the fittings if they are not in the optimal location.
Throughout the installation process, it's important to follow all the safety regulations and guidelines. Working with ADSS cable fittings often involves working at height and with electrical equipment, so safety should always be your top priority.
If you're in the market for high - quality ADSS cable fittings, we're here to help. Our products are made from top - notch materials and are designed to meet the highest industry standards. Whether you're a small - scale installer or a large - scale contractor, we can provide you with the right fittings for your project. Contact us for more information and to start a procurement discussion. We'll be more than happy to assist you in finding the best solutions for your ADSS cable installation needs.
References
- Electrical Power Transmission and Distribution Handbook
- ADSS Cable Installation Manuals from leading manufacturers