Hey there! As a supplier of Mounting Clamp Adapters, I'm super stoked to walk you through the process of installing one on a wall. Whether you're a DIY enthusiast or a professional installer, this guide will help you get the job done right.
What You'll Need
Before we jump into the installation process, let's gather the necessary tools and materials. You'll need:
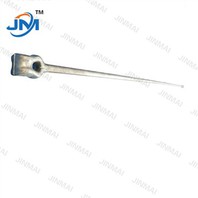
- A Mounting Clamp Adapter (obviously!)
- Screwdriver or drill
- Screws (make sure they're the right size for your wall type)
- Measuring tape
- Pencil
- Level
Step 1: Choose the Right Location
The first step is to decide where you want to install the Mounting Clamp Adapter. It's important to choose a location that is sturdy and can support the weight of whatever you'll be attaching to the adapter. If you're mounting it on a drywall, make sure to find a stud to screw into for extra support. You can use a stud finder to locate the studs in your wall.
Once you've found the right location, use your measuring tape and pencil to mark the spots where you'll be drilling the holes for the screws. Make sure the marks are level by using a level.
Step 2: Prepare the Wall
Now that you've marked the spots for the screws, it's time to prepare the wall. If you're using a drill, make sure to use the appropriate drill bit for the type of wall you're working with. For example, if you're drilling into a concrete wall, you'll need a masonry drill bit.


Drill the holes at the marked spots, making sure they're deep enough to accommodate the screws. If you're using a screwdriver, you can skip this step and just start screwing the adapter directly into the wall.
Step 3: Install the Mounting Clamp Adapter
With the holes drilled, it's time to install the Mounting Clamp Adapter. Place the adapter over the holes and align the screw holes on the adapter with the holes in the wall. Insert the screws into the holes and use your screwdriver or drill to tighten them. Make sure the adapter is securely attached to the wall and doesn't wobble.
Step 4: Attach Your Equipment
Once the Mounting Clamp Adapter is installed, you can attach your equipment to it. This could be anything from a light fixture to a shelf. Make sure to follow the manufacturer's instructions for attaching your equipment to the adapter.
Tips and Tricks
- If you're unsure about the weight capacity of the Mounting Clamp Adapter, check the product specifications or contact the manufacturer.
- When drilling into a wall, be careful not to drill too deep and damage any wires or pipes behind the wall.
- If you're working with a drywall, you can use wall anchors for extra support.
- Make sure to clean the wall before installing the adapter to ensure a better grip.
Related Products
As a Mounting Clamp Adapter supplier, we also offer a range of related products that you might find useful. Check out our Hot Dip Galvanized Accessory, Bolts Aluminium Clamp Tension Clamp, and Electric Pole Cross Arm. These products are designed to work seamlessly with our Mounting Clamp Adapters and can enhance the functionality and durability of your installation.
Contact Us for Purchase
If you're interested in purchasing our Mounting Clamp Adapters or any of our other products, we'd love to hear from you. We offer high-quality products at competitive prices, and our team is always ready to assist you with any questions or concerns you might have. Don't hesitate to reach out to us for more information or to start a purchase negotiation.
References
- Manufacturer's instructions for the Mounting Clamp Adapter
- DIY home improvement guides
- Online resources on wall installation techniques