One of the most useful tools in any DIY enthusiast's toolkit is a mounting clamp adapter. These handy devices allow you to securely attach various objects to different surfaces, providing a stable and reliable connection. Whether you're working on a home improvement project, a DIY electronics setup, or a custom furniture piece, a mounting clamp adapter can make your life much easier. In this blog post, I'll guide you through the process of making your own DIY mounting clamp adapter. As a professional Mounting Clamp Adapter supplier, I have extensive knowledge and experience in this field, and I'm excited to share it with you.
Understanding the Basics of Mounting Clamp Adapters
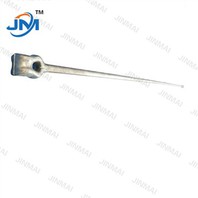
Before we dive into the DIY process, let's first understand what a mounting clamp adapter is and how it works. A mounting clamp adapter is a device that is used to connect two different components together. It typically consists of a clamp that holds one component firmly in place, and an adapter that allows the clamp to be attached to another surface or component.
The applications of mounting clamp adapters are vast. They can be used in various industries, including construction, manufacturing, and electronics. For example, in construction, mounting clamp adapters are used to secure pipes and cables to walls or other structures. In manufacturing, they are used to hold workpieces in place during machining operations. In electronics, they are used to mount components on circuit boards or other equipment.
There are different types of mounting clamp adapters available in the market, each designed for specific applications. Some common types include bolt-on adapters, screw-on adapters, and magnetic adapters. The type of adapter you choose will depend on the specific requirements of your project, such as the type of components you need to connect, the surface you need to attach to, and the level of stability and strength required.
Materials and Tools Needed
To make your own DIY mounting clamp adapter, you'll need the following materials and tools:


- Materials:
- Metal or plastic sheet - This will serve as the base material for your adapter. The choice of material depends on the strength and durability requirements of your project. Metal is generally stronger and more durable, while plastic is lighter and more affordable.
- Bolts, nuts, and washers - These will be used to assemble the clamp and attach it to the adapter.
- Rubber or silicone pads - These will be used to provide a non - slip surface between the clamp and the object being held.
- Tools:
- Drill - To make holes in the metal or plastic sheet for the bolts.
- Saw or cutter - To cut the metal or plastic sheet to the desired size and shape.
- Wrench or pliers - To tighten the bolts and nuts.
- Marker - To mark the positions for drilling holes.
Step-by - Step Guide to Making a DIY Mounting Clamp Adapter
Step 1: Design Your Adapter
The first step is to design your mounting clamp adapter based on the specific requirements of your project. Consider the size and shape of the components you need to connect, the type of surface you need to attach to, and the amount of force the adapter will need to withstand. You can use a pen and paper to sketch out your design, or you can use a computer - aided design (CAD) software if you have the skills and resources.
Step 2: Prepare the Base Material
Cut the metal or plastic sheet to the size and shape specified in your design using a saw or cutter. Make sure to wear safety goggles and gloves to protect yourself from sharp edges and debris. After cutting, use a file or sandpaper to smooth the edges of the sheet to prevent any injuries.
Step 3: Mark and Drill Holes
Use a marker to mark the positions for drilling holes on the base material. The holes should be located in the places where you plan to attach the bolts, nuts, and washers. Make sure the holes are the correct size for the bolts you will be using. Use a drill to carefully drill the holes. Again, wear safety goggles to protect your eyes from flying debris.
Step 4: Assemble the Clamp
Attach the bolts, nuts, and washers to the base material according to your design. Place the rubber or silicone pads on the clamping surface to provide a non - slip grip. Tighten the nuts using a wrench or pliers, but be careful not to overtighten them, as this could damage the base material or the bolts.
Step 5: Test the Adapter
Once the clamp adapter is assembled, test it to make sure it works properly. Try clamping the desired object to the surface and check for stability. Make any necessary adjustments to the tightening of the bolts or the position of the pads if the clamp doesn't hold the object securely.
Tips and Tricks for a Successful DIY Project
- Safety First: Always wear appropriate safety gear, such as safety goggles, gloves, and a dust mask, when working with tools and materials.
- Accuracy is Key: Take your time when measuring, marking, and cutting the materials. Small errors in measurement can lead to a poorly functioning adapter.
- Choose the Right Materials: Select materials that are suitable for the specific requirements of your project. For example, if your adapter will be exposed to high temperatures, choose a heat - resistant material.
- Practice Makes Perfect: If you're new to DIY projects, start with a simple design and practice on scrap materials before working on your final adapter.
Related Products and Their Applications
In addition to the DIY mounting clamp adapter, there are several related products that you might find useful in your projects. For instance, Bolts Aluminium Clamp Tension Clamp are commonly used in electrical power fittings. They provide a strong and reliable connection for cables and wires, ensuring the safe and efficient transmission of electricity.
ADSS Cable Fittings are another important product. These fittings are specifically designed for all - dielectric self - supporting (ADSS) cables, which are widely used in overhead power transmission systems. ADSS cable fittings help to secure and protect the cables, preventing damage from environmental factors such as wind, rain, and ice.
D Type Insulator Bracket are also commonly used in the electrical industry. They are used to support and insulate electrical conductors, ensuring that the electricity flows in the intended direction and preventing electrical accidents.
Contact Us for Professional Solutions
If you're looking for high - quality, ready - made mounting clamp adapters or other related products, you're in the right place. As a leading Mounting Clamp Adapter supplier, we offer a wide range of products that are designed to meet the diverse needs of our customers. Our products are made from high - quality materials and are manufactured to the highest standards of quality and craftsmanship.
Whether you're a small - scale DIY enthusiast or a large - scale industrial client, we can provide you with the products and solutions you need. Our team of experts is always ready to assist you with any questions or concerns you may have. We can help you choose the right product for your specific application, provide technical support, and even offer customized solutions if needed.
If you're interested in our products or would like to discuss your project requirements, please don't hesitate to get in touch with us. We look forward to working with you and helping you achieve your goals.
References
- "DIY Electronics Projects Handbook" by John Smith
- "Construction Fittings and Fixtures Guide" by Emily Brown
- "Electrical Power Transmission and Distribution Manual" by David Wilson