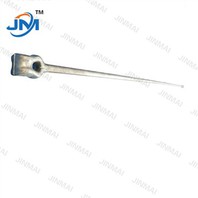
Galvanized cross arms are essential components in overhead power distribution systems, providing support for electrical conductors and other equipment. As a supplier of high - quality galvanized cross arms, I am often asked about the installation process. In this blog, I will walk you through the steps of installing a galvanized cross arm, from preparation to final inspection.
1. Pre - installation Preparation
Before starting the installation of a galvanized cross arm, it is crucial to conduct thorough preparation work. This will ensure the safety of the installation team and the proper functioning of the cross arm in the long run.
Site Inspection
First and foremost, a detailed site inspection should be carried out. The poles on which the cross arm will be installed need to be checked for their structural integrity. Look for signs of rot, decay, or damage. The height and spacing of the poles should also meet the design requirements of the overhead power system. The terrain around the poles should be clear of any obstacles that could interfere with the installation process.
Material and Tool Preparation
As a supplier, I can ensure that the galvanized cross arm you receive is of the highest quality. But in addition to the cross arm itself, you will need other materials and tools. For materials, you may need bolts, nuts, washers, and anti - corrosion coatings. The bolts and nuts should be made of suitable materials that can withstand the environmental conditions and the mechanical stress.
The tools required for installation include wrenches, saws, measuring tapes, and safety equipment such as hard hats, safety glasses, and harnesses. Make sure all tools are in good working condition and are appropriate for the size and type of the cross arm.
Safety Measures
Safety is of utmost importance during the installation process. All workers should be trained in safety procedures and be aware of the potential hazards associated with working on overhead power lines. Before starting the work, make sure the power in the area is shut off or properly insulated to prevent electric shock. The use of personal protective equipment is mandatory, and all safety protocols should be strictly followed.
2. Mounting the Galvanized Cross Arm on the Pole
Once the preparation work is completed, it's time to mount the galvanized cross arm on the pole.
Positioning the Cross Arm
First, determine the correct height and orientation of the cross arm on the pole. This is usually specified by the design of the overhead power system. Use a measuring tape to mark the position accurately on the pole. The cross arm should be level and parallel to the ground to ensure the proper support of the electrical conductors.
Attaching the Cross Arm
There are different methods to attach the cross arm to the pole, and one common way is using bolts and nuts. Drill holes in the pole and the cross arm at the pre - marked positions. Insert the bolts through the holes and secure them with nuts and washers. Make sure the bolts are tightened properly to prevent the cross arm from moving or vibrating.


Another method is using U - bolts. Wrap the U - bolts around the pole and the cross arm, and then tighten the nuts. U - bolts can provide a more flexible and adjustable way of attaching the cross arm, especially for poles with non - standard shapes.
3. Connecting Electrical Conductors and Equipment
After the cross arm is securely mounted on the pole, the next step is to connect the electrical conductors and other equipment.
Conductor Installation
The electrical conductors, such as power lines, need to be carefully installed on the cross arm. Use appropriate insulators to support the conductors and prevent electrical contact with the cross arm. The insulators should be installed according to the manufacturer's instructions. Make sure the conductors are properly tensioned to avoid sagging or excessive stress.
Equipment Installation
In addition to conductors, other equipment such as transformers, switches, and lightning arresters may also be installed on the cross arm. Each piece of equipment should be installed in the correct position and connected to the conductors and the grounding system. The grounding system is crucial for protecting the equipment and personnel from electrical surges.
4. Quality Inspection and Testing
Once the installation is completed, a comprehensive quality inspection and testing should be carried out.
Visual Inspection
Conduct a visual inspection of the installed cross arm and all the connected equipment. Check for any signs of damage, misalignment, or loose connections. Make sure the cross arm is firmly attached to the pole and the conductors are properly supported.
Electrical Testing
Electrical testing is also necessary to ensure the proper functioning of the overhead power system. Test the insulation resistance of the conductors and equipment to detect any potential electrical faults. Check the grounding system to ensure it can effectively protect against electrical surges.
5. Maintenance and Long - term Considerations
After the successful installation of the galvanized cross arm, regular maintenance is required to ensure its long - term performance.
Corrosion Prevention
As a supplier of Hot Dip Galvanized Overhead Line Hardware, I know that the galvanized coating on the cross arm provides excellent corrosion resistance. However, over time, the coating may be damaged due to environmental factors or mechanical stress. Regularly inspect the cross arm for signs of corrosion and apply additional anti - corrosion coatings if necessary.
Equipment Upgrades
With the development of the power industry, new technologies and equipment may become available. Consider upgrading the electrical equipment on the cross arm to improve the efficiency and reliability of the overhead power system.
Safety Monitoring
Continuously monitor the safety of the overhead power system. Check for any signs of damage or malfunction in the cross arm and the connected equipment. Regularly review and update the safety procedures to ensure the well - being of the maintenance personnel.
Conclusion
Installing a galvanized cross arm is a complex process that requires careful preparation, proper installation techniques, and thorough inspection. As a trusted supplier of galvanized cross arms and related Overhead Pole Line Hardware, I am committed to providing high - quality products and technical support to ensure the success of your overhead power system installation.
If you are in need of galvanized cross arms or other Electric Power Stringing equipment, please feel free to contact us for procurement and further discussions. Our team of experts is ready to assist you with your specific requirements.
References
- Electrical Power Distribution Handbook by Terry L. Wildi
- Overhead Transmission Line Engineering by Edward W. Kimbark
- Standards for Galvanized Steel Products published by relevant industry associations