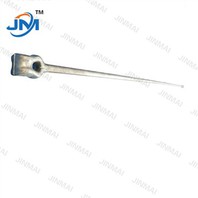
Hey there! As a supplier of Steel Angle Cross Arms, I've seen firsthand the importance of getting the installation right. One crucial aspect is adjusting the position of the steel angle cross arm during installation. In this blog, I'll share some practical tips on how to do it properly.
Understanding the Basics
Before we dive into the adjustment process, let's quickly go over what a steel angle cross arm is and its role. A steel angle cross arm is a key component in overhead power lines. It's used to support conductors, insulators, and other equipment. Its proper positioning ensures the stability and safety of the entire power line system.
Pre - installation Checks
First things first, before you even start thinking about adjusting the position, you need to conduct a thorough pre - installation check.
- Inspect the Arm: Look for any signs of damage, like cracks or bends. A damaged cross arm won't hold up well and could lead to problems down the line.
- Verify Dimensions: Make sure the cross arm's dimensions match the specifications of your project. This includes the length, width, and angle of the steel angle.
- Check Mounting Points: Examine the poles or structures where the cross arm will be mounted. They should be sturdy and in good condition. Any instability in the mounting points can affect the cross arm's position and performance.
Tools You'll Need
To adjust the position of a steel angle cross arm, you'll need a few essential tools:
- Wrenches: Different sizes of wrenches are required to loosen and tighten the bolts that secure the cross arm.
- Level: A spirit level helps you ensure that the cross arm is perfectly horizontal. This is crucial for evenly distributing the weight of the conductors and other equipment.
- Measuring Tape: You'll use it to measure distances and ensure accurate positioning of the cross arm on the pole.
- Lifting Equipment: Depending on the size and weight of the cross arm, you may need a crane or other lifting devices to move it into place.
Step - by - Step Adjustment Process
Step 1: Initial Placement
Use the lifting equipment to hoist the steel angle cross arm onto the pole. Place it roughly in the desired position, but don't tighten the bolts just yet. Make sure it's sitting on the mounting brackets or saddles properly.
Step 2: Leveling
This is a critical step. Place the spirit level on top of the cross arm. Check both the horizontal and, if necessary, the vertical alignment. If the cross arm is not level, you'll need to make adjustments.
- Adjusting Height: If one end of the cross arm is higher than the other, you can use shims to raise the lower end. Shims are small pieces of metal or other materials that can be inserted between the cross arm and the mounting surface.
- Side - to - Side Adjustment: To correct any side - to - side misalignment, gently push or pull the cross arm until it's straight. You may need to have someone on the ground guiding you to ensure accurate alignment.
Step 3: Measuring and Marking
Once the cross arm is level, use the measuring tape to measure the distance from the pole to the end of the cross arm. Compare these measurements with the project specifications. Mark the correct position on the pole or mounting brackets if needed. This will help you double - check the alignment and ensure that all cross arms on a line are in the same position.
Step 4: Tightening the Bolts
After you're satisfied with the position of the cross arm, start tightening the bolts. Do it gradually and evenly to avoid over - tightening one side and causing the cross arm to become misaligned again. Make sure all bolts are tightened to the recommended torque. You can refer to the manufacturer's guidelines for the correct torque values.
Step 5: Final Checks
Once the bolts are tightened, re - check the level and alignment of the cross arm. Use the spirit level and measuring tape again. Also, give the cross arm a gentle shake to ensure it's firmly attached. If you notice any movement or misalignment, loosen the bolts slightly and make further adjustments.
Common Issues and Solutions
- Uneven Weight Distribution: If the conductors or other equipment on the cross arm are not evenly distributed, it can cause the cross arm to tilt. To fix this, re - arrange the conductors or add counterweights if necessary.
- Mounting Point Problems: If the pole or mounting structure is not perfectly vertical, it can affect the cross arm's position. In this case, you may need to adjust the cross arm's angle slightly to compensate for the pole's tilt. However, if the pole is severely tilted or damaged, it should be repaired or replaced before installing the cross arm.
- Weather Conditions: Wind, rain, or extreme temperatures can make the adjustment process more challenging. In windy conditions, use additional support to keep the cross arm stable during installation. In cold weather, make sure the bolts are not frozen and can be tightened properly.
Importance of Proper Adjustment
Getting the position of the steel angle cross arm right is not just about aesthetics. It has a significant impact on the performance and safety of the overhead power line system.
- Safety: A properly adjusted cross arm ensures that the conductors are at the correct height and distance from the ground and other objects. This reduces the risk of electrical hazards, such as short circuits and electrocution.
- Performance: Correct positioning helps in evenly distributing the load on the cross arm and the pole. This extends the lifespan of the equipment and reduces the likelihood of structural failures.
- Compliance: Many regulatory bodies have specific requirements for the installation of overhead power line components. Properly adjusting the cross arm ensures that your project meets these standards.
Related Products
If you're involved in overhead power line projects, you might also be interested in some related products. For Electric Power Stringing, we offer high - quality equipment that can make the stringing process more efficient. Our Galvanized Cross Arm provides excellent corrosion resistance, which is essential for long - term use in outdoor environments. And our Hot Dip Galvanized Overhead Line Hardware is known for its durability and reliability.
Conclusion
Adjusting the position of a steel angle cross arm during installation is a crucial task that requires attention to detail and the right tools. By following the steps outlined in this blog, you can ensure a successful installation. If you have any questions or need further assistance with your steel angle cross arm project, don't hesitate to reach out. We're here to help you with all your overhead line fitting needs. Whether you're a small - scale contractor or a large utility company, we can provide the products and support you require. Contact us to start a procurement discussion and find the best solutions for your project.


References
- Industry standards for overhead power line installation
- Manufacturer's guidelines for steel angle cross arms
- Best practices in electrical engineering for overhead line construction