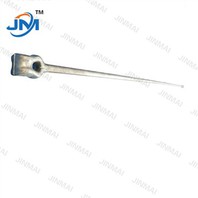
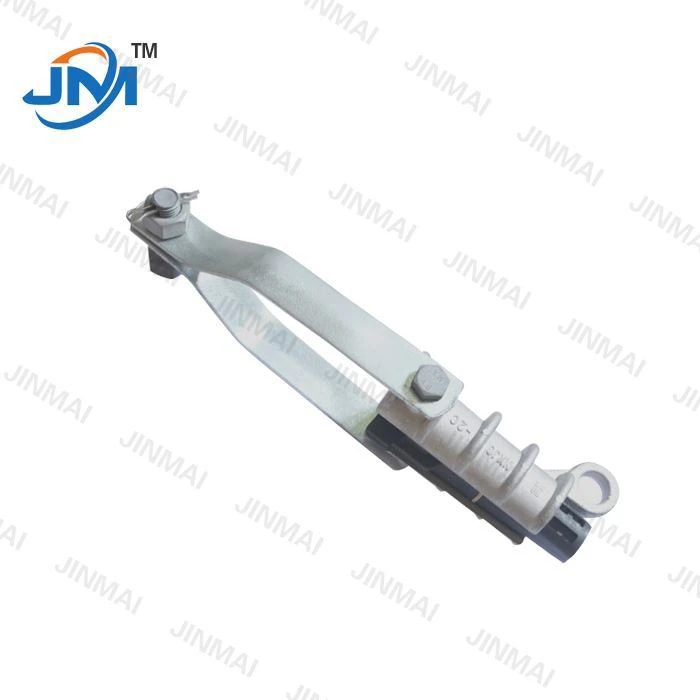
As a trusted supplier of Mounting Clamp Adapters, I understand the importance of proper maintenance and replacement of these essential components. A worn - out mounting clamp adapter can compromise the safety and functionality of your electrical or mechanical systems. In this blog post, I'll guide you through the process of replacing a worn - out mounting clamp adapter step by step.
Step 1: Identify the Problem
The first step in replacing a mounting clamp adapter is to accurately identify the problem. Look for signs of wear and tear such as cracks, corrosion, or deformation. A damaged adapter may not hold the connection securely, leading to loose fittings, which can cause electrical arcing or mechanical instability. Inspect the adapter visually and also check for any unusual noises or vibrations that could indicate a problem.
Step 2: Gather the Necessary Tools and Materials
Before you start the replacement process, gather all the tools and materials you'll need. You'll typically need a set of wrenches, screwdrivers, and possibly a socket set. Make sure you have the correct replacement mounting clamp adapter. As a supplier, we offer a wide range of high - quality mounting clamp adapters that are designed to meet various industry standards. Additionally, you may need some lubricant to ease the installation process and ensure a smooth fit.
Step 3: Disconnect the Power or System
Safety is of utmost importance when working on any electrical or mechanical system. If the mounting clamp adapter is part of an electrical circuit, turn off the power at the main switch or breaker panel. For mechanical systems, make sure the equipment is shut down and any moving parts are locked in place. This will prevent any accidental injuries during the replacement process.

Step 4: Remove the Old Mounting Clamp Adapter
Once the power or system is disconnected, carefully remove the old mounting clamp adapter. Use the appropriate tools to loosen the bolts or screws that hold the adapter in place. In some cases, the adapter may be held in position by a locking mechanism. Follow the manufacturer's instructions to release this mechanism safely. Be gentle when removing the adapter to avoid damaging any surrounding components.
Step 5: Inspect the Surrounding Area
After removing the old adapter, take a moment to inspect the surrounding area. Look for any signs of damage or debris that may have contributed to the adapter's wear. Clean the area thoroughly to ensure a proper fit for the new adapter. If there are any damaged parts, consider replacing them at this time to prevent future problems.
Step 6: Prepare the New Mounting Clamp Adapter
Before installing the new adapter, inspect it carefully to ensure it is in good condition. Check the dimensions and specifications to make sure it matches the requirements of your system. If necessary, apply a small amount of lubricant to the contact points of the adapter. This will make the installation process easier and help prevent corrosion in the future.
Step 7: Install the New Mounting Clamp Adapter
Place the new mounting clamp adapter in the correct position. Align it with the holes or mounting points on the equipment. Insert the bolts or screws and tighten them gradually. Make sure the adapter is firmly secured but avoid over - tightening, as this can damage the adapter or the surrounding components. If the adapter has a locking mechanism, engage it according to the manufacturer's instructions.
Step 8: Reconnect the Power or System
Once the new adapter is installed, it's time to reconnect the power or system. For electrical systems, turn on the power at the main switch or breaker panel and check for proper operation. For mechanical systems, start the equipment and monitor it for any unusual noises or vibrations. If everything appears to be working correctly, the replacement process is successful.
Step 9: Test the System
After reconnecting the power or system, perform a thorough test. Check the connection for stability and ensure that there are no loose fittings. In electrical systems, measure the voltage and current to ensure they are within the normal range. For mechanical systems, test the equipment under normal operating conditions to confirm that the new adapter is functioning properly.
Step 10: Document the Replacement
It's a good practice to document the replacement process. Keep a record of the date of replacement, the type of adapter used, and any observations during the installation. This documentation can be useful for future maintenance and troubleshooting.
Related Products
In addition to mounting clamp adapters, we also supply other related products that may be of interest to you. For example, our Pole Top Bracket is a high - quality product that is widely used in electrical power systems. The NXJG Wire Clamp is another essential component for securing wires. And our Bolts Aluminium Clamp Tension Clamp is designed to provide reliable tension in various applications.
Contact Us for Purchase and Consultation
If you are in need of a mounting clamp adapter or any of our other products, we invite you to contact us for further details. Our team of experts is always ready to assist you with your purchase and provide professional advice on installation and maintenance. Whether you are a small - scale business or a large industrial enterprise, we can offer you the right solutions to meet your specific needs.
References
- Electrical Installation Handbook, Schneider Electric
- Mechanical Maintenance Guide, Industrial Press Inc.